# Pikatea Macropad Custom User Guide
Congratulations on receiving your custom made "Pikatea Macropad Custom"! This quick guide will walk you through how to use it.
# What’s in the Box
- (1) Pikatea Macropad Custom (configured to your liking)
- (2) Screws
- (2) Mounting tape
# Mounting
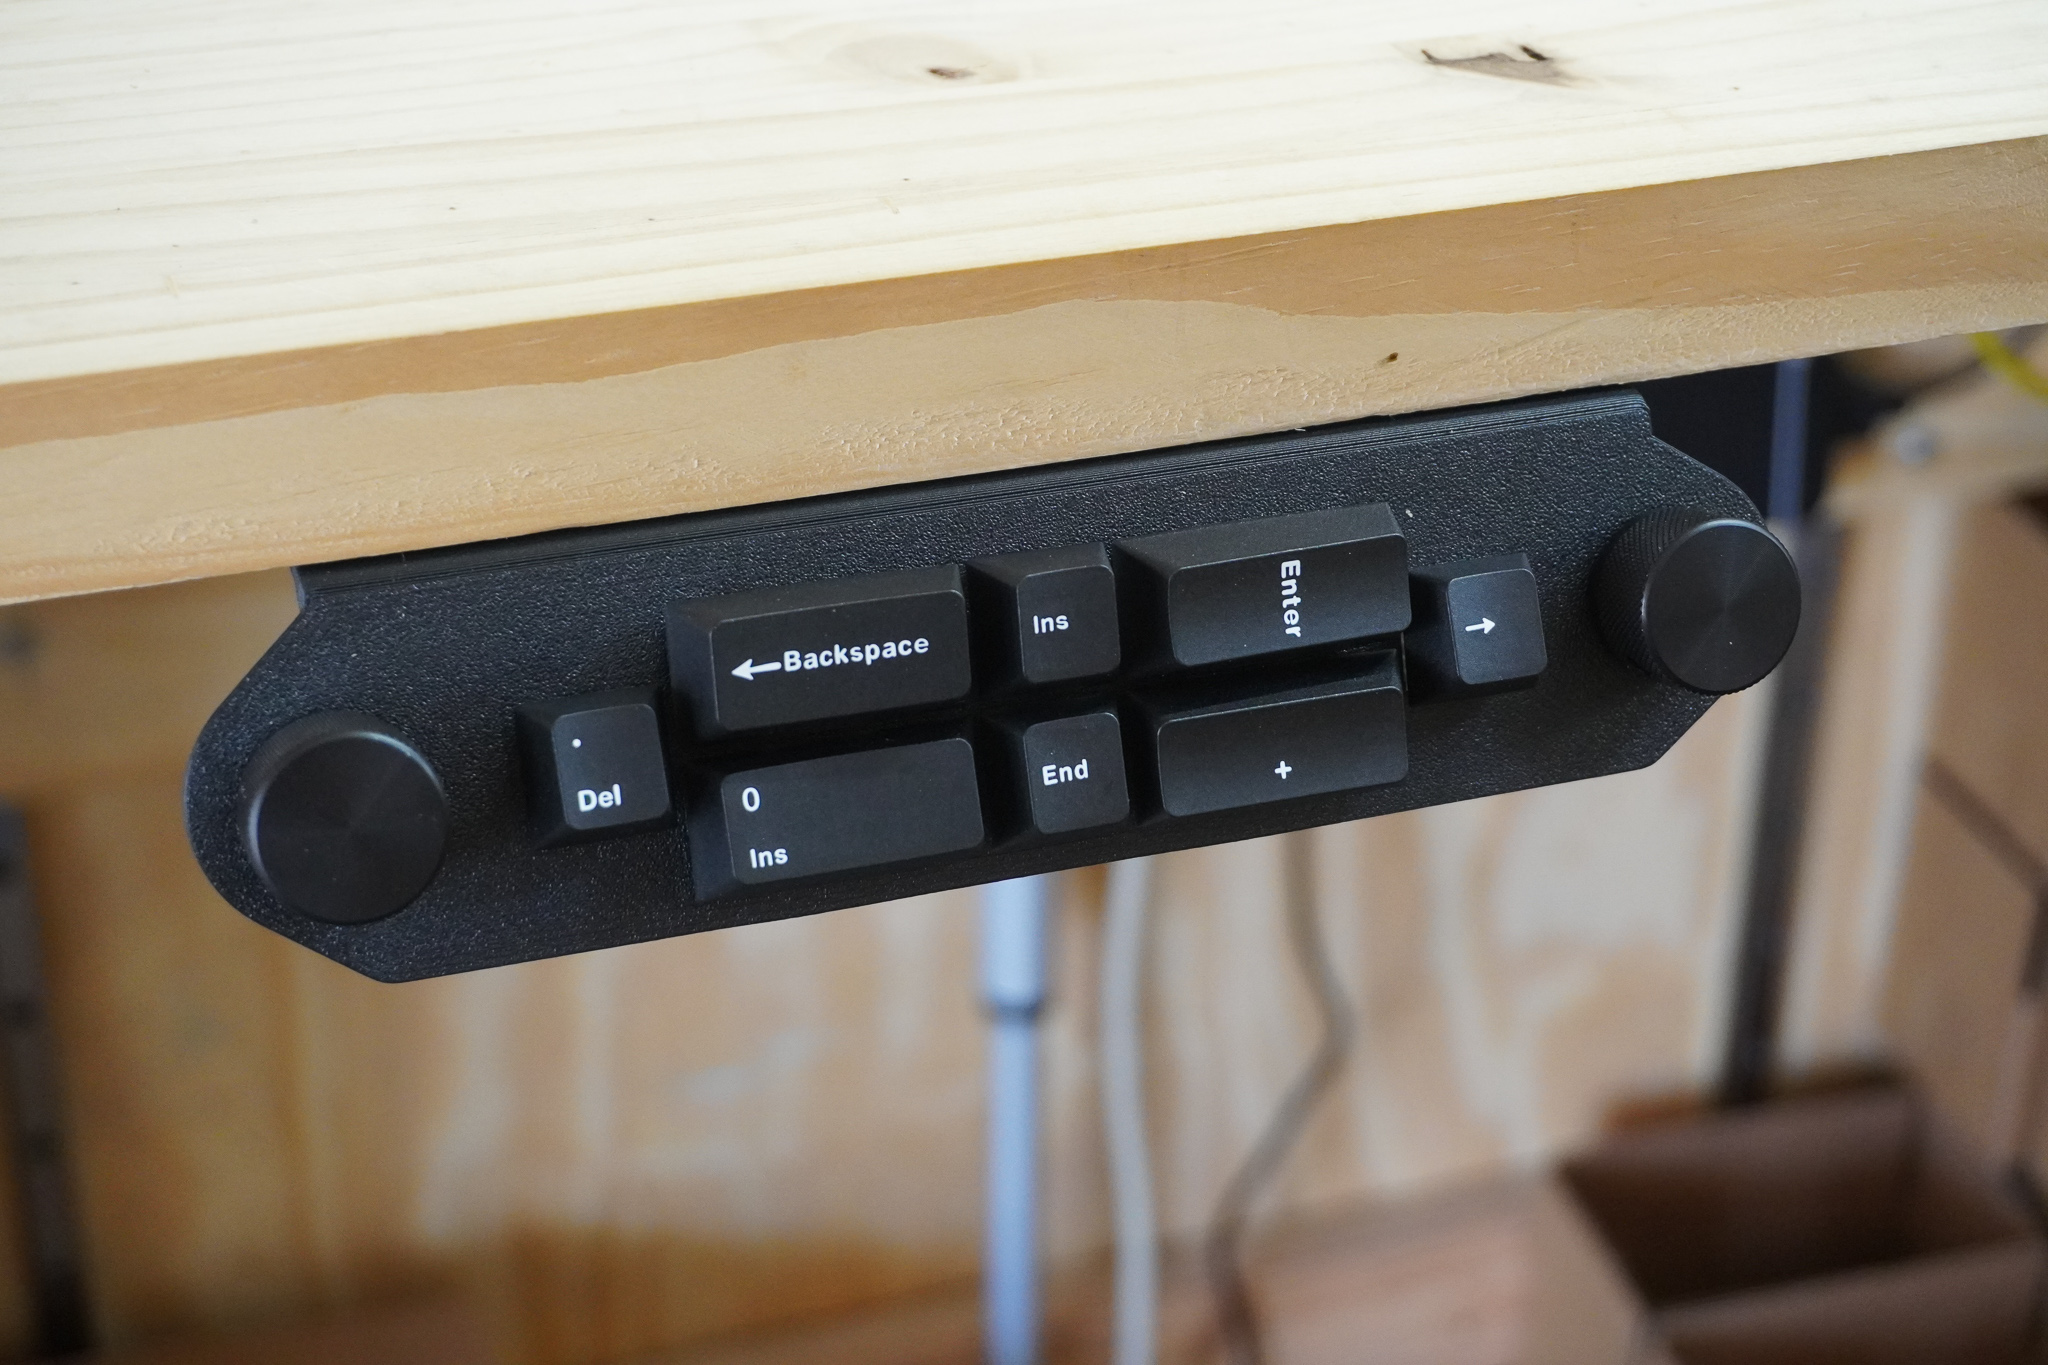
Mounting can be done with the included screws or the doubled sided tape. Place 1 of the 2 included mounting strips on the macropad and remove the protective covering. Align the Macropad to the underside of your desk, monitor or other surface and press firmly for 10 seconds or more if needed. The bond will grow stronger over time. Be careful not to cover up any monitor buttons.
More mounting tape can be bought on our store in sets of 4.
Note: It's good practice to secure the USB cable with a cable tie or similar so that if the cord gets pulled the macropad is not effected.
# Programming and Usage
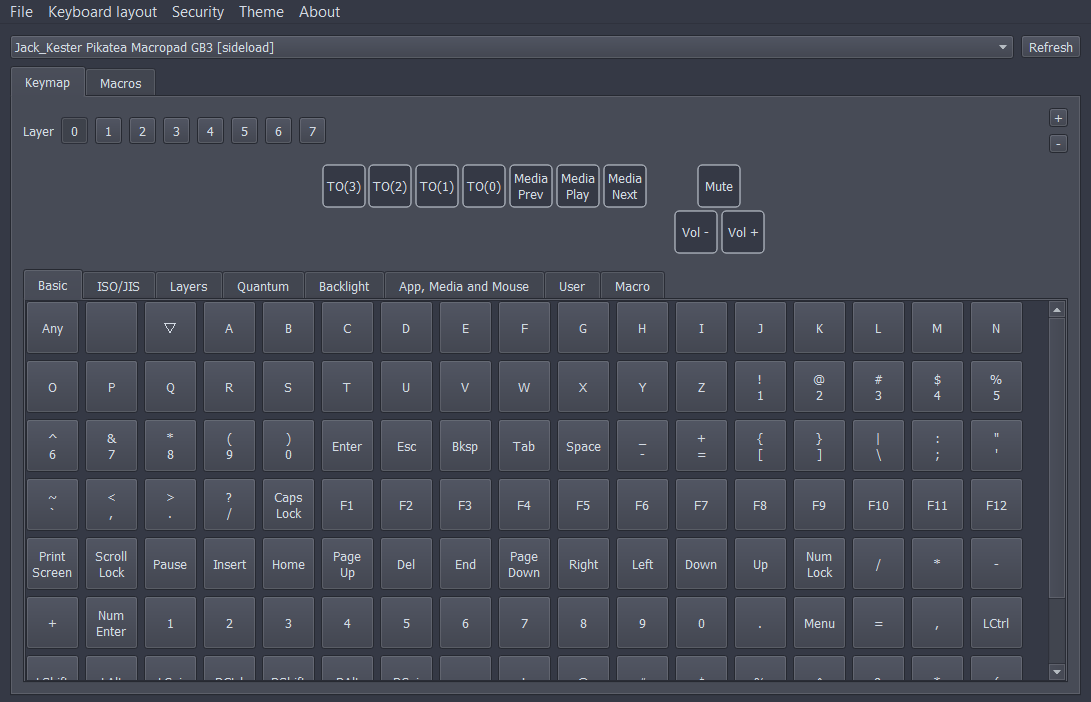
# Vial
Vial compatible firmware is already loaded onto your macropad. Vial is an open source program that makes it easy to configure the device with a simple interface. To get started, download Vial from the official website here (opens new window). Download and install the latest version (Currently Beta 0.5.2).
After Vial is installed, open the program.
Make sure your device is connected, and click "refresh". The program will automatically detect all Vial compatible devices connected. If you have multiple devices, you can cycle them with the drop down at the top. Make sure the device you want is selected and the layout matches.
Note: We use the same firmware for all our custom macropads. Because of this, the layout won't exactly match up. We wire up the switches so from left-to-right in the software represents the switches on your macropad from left-to-right and top-to-bottom. Encoders are also reprsented from left-to-right.
More information on VIAL can be found on the offical Vial usage guide (opens new window)
# Example Uses
This is a list we've generated of useful ways and programs to use your Pikatea Macropad with. These are just examples. We also have some more advanced tips and tricks here
Music control - My favorite way to use the Pikatea Macropad. I usually configure 3 buttons for Play/Pause, Next, and Previous songs. The knob is used to control volume. This works well with Spotify. Pair with Toastify for an even better experience.
Audio Mixing - Use the software from Actualsolution called Power Mixer (opens new window) to control the audio levels of individual programs and create the perfect mix. It's a paid program ($17.95) but includes a free trial and is definitely worth the price. Another method is to use the provided Midi firmware and Midi Mixer (opens new window) View Guide (opens new window)
Muting Your Microphone Globally - Use Microsoft PowerToys (opens new window) or SoundSwitch (opens new window) to mute your microphone with a key press.
Screenshots - Configure a macro to press Menu+Shift+s to open up the screenshot tool on Windows 10.
Control selected audio device - SoundSwitch (opens new window) (PC) or SoundSource (opens new window) (Mac) - This is an amazing computer program that makes it very easy to switch audio devices with a macro or hotkey.
In conjunction with AutoHotkey - AutoHotkey (opens new window) is a powerful scripting language that can do automated tasks. It can be triggered by a hotkey press so it's perfect to use with the Pikatea Macropad.
Streaming - Configure OBS or other streaming platforms to change scenes or camera angles. We like to have a button to blank the display.
Video Editing - Program the knob to press the correct keys to move the timeline back and forth for any video editing program.
Monitor Control - Use MultiMonitorTool or MonitorSwitcher to make switching monitor configurations easy. Combine it with your macropad to make it even easier!
# QMK and VIA Programming
The Pikatea Macropad is compatible with QMK and VIA firmware.
Pikatea QMK Fork (opens new window) - Use this fork to create your own firmware powered by QMK and/or VIA
Pikatea VIAL-QMK Fork (opens new window) - Use this fork to create your own firmware powered by Vial
# Troubleshooting
Vial isn't detecting the device!
- Make sure you have the correct version of Vial installed for the firmware (in this case it's 0.4.2 beta). If you are on linux, make sure to follow the udev portion of the install (opens new window)
- reflash the firmware
Sometimes the device doesn't work as expected. If this is the case, we can do a replacement/repair up to 3 months after receiving your device.
Have some advice or need more help? Let us know on Discord (opens new window) or through our Contact Us (opens new window) form.